
Table of Contents
- What Is a Sewer Inspection and Why It Matters
- Signs You Need a Sewer Inspection
- How Long Does a Sewer Inspection Take
- The Step-by-Step Sewer Inspection Process
- Common Sewer Line Problems Detected During Inspection
- Sewer Camera Inspection Equipment and Tools
- What Happens After the Inspection: Your Report and Next Steps
- Sewer Scope Inspection Cost and What to Expect
- Frequently Asked Questions
Last Updated: September 3, 2026
What Is a Sewer Inspection and Why It Matters
A sewer inspection is a diagnostic procedure that uses a specialized video camera to examine the interior condition of your sewer line and drainage system. The camera travels through your pipes, recording visual data that reveals blockages, damage, tree root intrusion, and structural issues that would otherwise remain hidden underground. At Alpha Rooter & Plumbing, we use this technology to help homeowners and property managers understand exactly what’s happening beneath their properties before costly repairs become necessary.
A sewer scope inspection gives you visibility into a system you can’t see, allowing you to make informed decisions about repairs, negotiate with real estate agents during home purchases, or plan preventative maintenance before an emergency strikes. The procedure is non-invasive, relatively quick, and provides concrete visual evidence of pipe conditions.
Signs You Need a Sewer Inspection
Certain warning signs indicate that a sewer inspection should move to the top of your priority list.
Persistent slow drains across multiple fixtures suggest a blockage or partial collapse in the main sewer line rather than isolated clogs. If plunging and drain cleaning don’t resolve the issue, a camera inspection reveals whether the problem is debris accumulation, tree roots, or structural damage.
Recurring backups in your basement or lowest-level fixtures indicate that wastewater can’t flow freely through your sewer lateral. This is especially common in older neighborhoods where cast iron pipes from the 1950s and earlier have corroded or cracked over decades.
Gurgling sounds from drains, toilets, or pipes suggest air pockets trapped in your drainage system, a sign of partial blockages or offset joints where pipes have shifted out of alignment.
Sewage odors near your cleanout or in your yard point to leaks or breaks in the line where wastewater is escaping into the soil.
Patches of unusually lush grass or areas of standing water in your yard may indicate a break in the sewer line where wastewater is leaking into the soil.
Before purchasing a home, especially one built before 1980, a sewer scope inspection is essential. Older homes often have clay, cast iron, or concrete pipes that deteriorate over time (peer-reviewed research). Discovering a collapsed section or severe root intrusion before closing protects you from inheriting tens of thousands of dollars in repairs.
If you’re selling your home and a buyer requests a sewer inspection, don’t view it as a threat. Transparency about your sewer system’s condition builds trust and often leads to smoother transactions.
How Long Does a Sewer Inspection Take
A typical residential sewer inspection takes between 30 minutes and 2 hours. The actual camera work, inserting the probe, recording video, and identifying issues, takes 30 to 45 minutes. If significant blockages need to be cleared before the camera can pass, the process extends toward the two-hour range.
The initial setup and location of your cleanout access point can add 10 to 15 minutes. Older properties sometimes have access points buried under concrete, landscaping, or soil, requiring excavation before the inspection can begin.
Most homeowners can expect to be present for 45 minutes to 90 minutes total, including setup, the inspection itself, and a preliminary discussion of findings.
The Step-by-Step Sewer Inspection Process
Understanding the mechanics of a sewer inspection demystifies the procedure and helps you know what to expect when a technician arrives at your property.
Step 1: Locating the Access Point
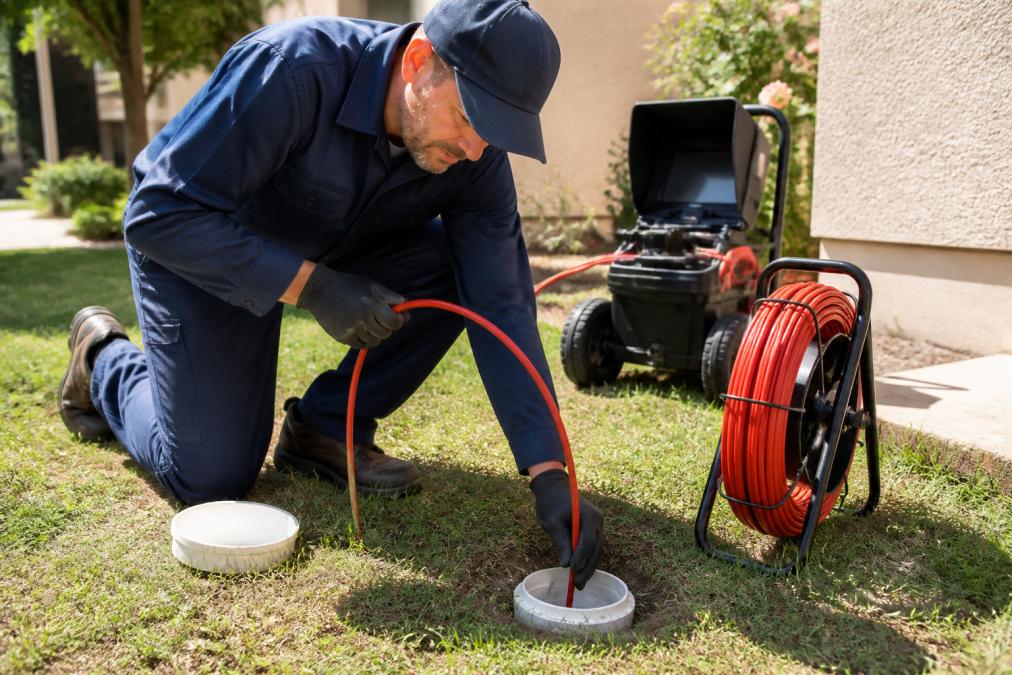
Every sewer system has at least one cleanout, an access point where the main sewer line connects to the building’s interior drainage. This is where the camera probe enters the pipe.
Cleanouts are typically located in your basement, crawlspace, or yard. In residential properties, they’re usually 4-inch PVC or cast iron pipes with removable caps. The technician will locate this access point and remove the cap, exposing the opening where the camera will be inserted.
If your cleanout is buried, inaccessible, or doesn’t exist, the technician may need to access the line through your toilet or another fixture, or locate an alternative entry point.
Step 2: Inserting the Sewer Camera
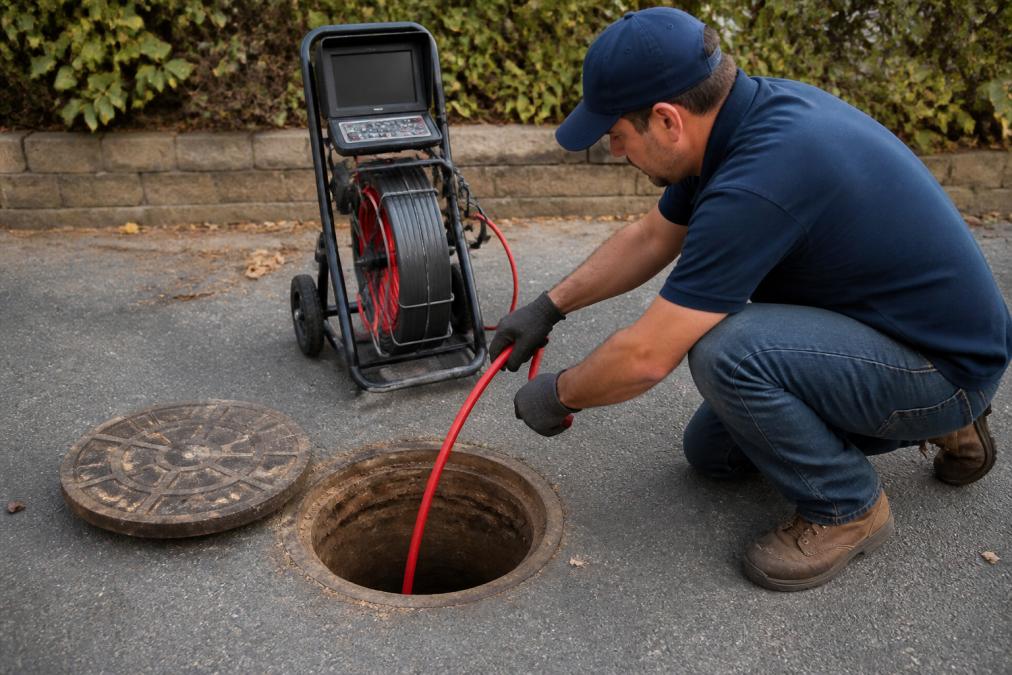
Once the access point is open, the technician feeds a flexible borescope, a specialized camera probe, into the sewer line. The camera is attached to a long, flexible rod that can navigate bends and obstacles in the pipe.
The probe is typically 3/8 inch to 1/2 inch in diameter, small enough to fit through standard residential sewer lines (astm.org). As it moves through the pipe, the camera captures real-time video footage displayed on a monitor. The technician controls the direction and speed of the probe, pausing at areas of concern to examine damage, blockages, or structural issues.
Step 3: Recording Video Data
Everything the camera sees is recorded and saved as digital video data. The video is timestamped and labeled with distance markers, so you can identify exactly where in the sewer line problems occur. This precision is crucial when planning repairs.
Many inspection companies provide homeowners with a copy of the video or a detailed report with still frames highlighting key findings. This documentation is invaluable during real estate transactions or when obtaining repair estimates from contractors.
Step 4: Identifying Issues
As the camera travels through the pipe, the technician continuously evaluates the interior condition, looking for:
Blockages from grease accumulation, toilet paper, debris, or foreign objects.
Tree root intrusion, which shows as hair-like roots penetrating through pipe joints or cracks.
Pipe collapse or severe cracks indicating structural failure.
Corrosion in cast iron or concrete pipes, appearing as deterioration or pitting.
Offset joints where two pipe sections have shifted out of alignment.
Pipe material identification to determine the age and condition of your system.
The technician documents all findings with video timestamps and distance markers for the final report.
If the camera encounters a complete blockage it cannot pass, the technician will note the location and inform you that the line cannot be fully inspected beyond that point. A blockage must be cleared (typically through hydro-jetting) before a full inspection can proceed.
Common Sewer Line Problems Detected During Inspection
Tree root intrusion is one of the most frequent findings in residential sewer inspections. Roots seek moisture and nutrients in wastewater, penetrating pipes through cracks or joints and eventually blocking flow or causing rupture. Properties with mature trees, particularly willows and oaks, face higher risk.
Grease and soap buildup accumulates on pipe walls over years of use, gradually restricting flow. Hydro-jetting can clear buildup temporarily, but disposal habits must change to prevent recurrence.
Pipe collapse occurs when the structural integrity of the pipe fails completely. This is most common in cast iron pipes from the 1950s and earlier, which corrode from the inside out. Collapsed sections require excavation and replacement.
Offset joints develop when ground settlement shifts pipes out of alignment. The step created at the joint traps debris and restricts flow.
Cracks and fractures allow groundwater to infiltrate the sewer line and wastewater to escape into surrounding soil, weakening the pipe structure.
Bellied sections occur when a portion of the pipe sags due to ground settlement. Wastewater pools in the sag, creating blockages.
Corrosion in cast iron pipes produces a rough, deteriorated interior surface that eventually leads to leaks or collapse.
Sewer Camera Inspection Equipment and Tools
Professional sewer camera inspection relies on specialized equipment designed to navigate underground pipes and capture detailed visual data.
The flexible borescope is the core tool, consisting of a camera head (typically 3/8 to 1/2 inch in diameter) attached to a flexible, push-rod cable that can extend 100 to 400 feet. The camera transmits live video to a handheld monitor or truck-mounted display.
The monitor displays the video feed and often includes distance markers and recording controls. Modern systems record in high definition, capturing fine detail that reveals small cracks, corrosion, and root intrusion.
The push-rod or cable is made of flexible steel or composite material, allowing it to navigate bends and changes in pipe diameter. The rod is marked at regular intervals so the technician can identify the exact location of problems.
The reel or motorized cart holds and controls the cable, allowing the technician to feed the probe into the pipe at a controlled pace.
Locating equipment such as ground-penetrating radar or electromagnetic locators helps identify the path of the sewer line underground and pinpoint the location of blockages or damage.
Cleaning equipment such as hydro-jets or mechanical augers may be used before or during inspection to clear blockages that prevent the camera from passing through the full length of the line.
What Happens After the Inspection: Your Report and Next Steps
Once the camera inspection is complete, the technician compiles findings into a detailed sewer report that documents the condition of your sewer line and recommends next steps.
The written report includes a description of the pipe material, the overall condition rating, specific issues identified with their locations, and recommendations for repair or maintenance. Most reports include still-frame images from the video highlighting key findings.
The video recording is either provided to you on a USB drive or made available through an online portal, allowing you to review the findings yourself and share the report with contractors, real estate agents, or other professionals.
For real estate transactions, the inspection report becomes a negotiation tool. If significant issues are found, the buyer may request that the seller repair them, offer a price reduction, or provide an escrow account to cover future repairs.
For existing homeowners, the report informs decisions about preventative maintenance or elective repairs. You might choose to replace a slightly corroded section now rather than risk a failure in five years.
If your inspection reveals issues, get estimates from multiple contractors before committing to repairs. The sewer report provides concrete evidence of what needs to be fixed, allowing contractors to give accurate quotes.
Sewer Scope Inspection Cost and What to Expect
Most residential sewer inspections range from a few hundred dollars to around a thousand dollars, depending on the length of your sewer line, the accessibility of your cleanout, and the complexity of your drainage system. Properties with easily accessible cleanouts and shorter sewer lines fall at the lower end of this range.
Many homebuyers include a sewer inspection as part of their home inspection contingency during real estate transactions. The cost is often negotiable, with some sellers agreeing to cover the inspection cost as part of the sale agreement.
The cost of an inspection is minimal compared to the cost of repairs. A collapsed sewer line requiring excavation and replacement can cost tens of thousands of dollars. Discovering that problem through inspection before it fails allows you to plan repairs on your timeline rather than facing an emergency.
When contacting a plumber for a sewer inspection, ask for a clear quote that includes the inspection fee, any charges for locating the cleanout if it’s buried, whether the quote includes a written report and video copy, and pricing for any necessary cleaning or clearing of blockages discovered during inspection.
Alpha Rooter & Plumbing provides upfront pricing for sewer inspections with no hidden fees. Our licensed technicians explain findings in detail and provide written reports with video documentation so you have concrete evidence of your sewer line’s condition.
Understanding what happens during a sewer inspection helps you make informed decisions about your home’s drainage system. Whether you’re facing recurring backups, purchasing a property, or managing a multi-unit building, a professional sewer scope inspection reveals hidden problems before they become expensive emergencies. When you’re ready to schedule an inspection or discuss sewer line concerns, Alpha Rooter & Plumbing’s team can evaluate your situation and provide expert guidance on the best course of action. Call now for a consultation and discover exactly what’s happening beneath your property.
Frequently Asked Questions
Q: What fails a sewer inspection?
A: A sewer inspection reveals failures when the camera detects structural damage, blockages, tree root intrusion, corrosion, offset joints, or pipe collapse. Grease buildup, broken sections, and misaligned pipes are common reasons for failure. The inspector documents each issue with video evidence, which determines whether repair or replacement is needed and helps establish repair cost estimates for negotiation during real estate transactions.
Q: How long does a sewer inspection usually take?
A: Most sewer inspections take 30 minutes to 2 hours, depending on the length of your sewer line, accessibility of the cleanout, and the number of issues found. Shorter residential lines typically complete in 45 minutes to 1 hour. Longer lines, older pipes, or lines with multiple blockages may require additional time. The inspector will provide a timeline estimate before beginning.
Q: Is a sewer scope inspection worth the cost?
A: A sewer scope inspection is worth the investment if you’re buying a home with an older sewer line, experiencing recurring backups or slow drains, or need documentation for insurance or real estate contingencies. The visual data from inspection prevents costly surprises after purchase and helps you negotiate repairs based on actual findings rather than guesswork. For homebuyers, it protects a major investment.
Q: What do sewer inspectors look for?
A: Inspectors look for blockages, tree root intrusion, pipe corrosion, structural damage, offset joints, grease accumulation, and signs of pipe collapse. They assess pipe material, check for backups, and document the overall condition of your drainage system and main sewer line. The video inspection creates a permanent record of the wastewater infrastructure condition, which is critical for repair planning and real estate decisions.
This article was written using GrandRanker
Comments are closed