
Table of Contents
- Why Sewer Camera Inspection Matters for Your Plumbing
- Step 1: Locate Your Sewer Access Point and Cleanout
- Step 2: Clear and Prepare Your Plumbing System
- Step 3: Understand Safety Precautions for Inspection
- How Long Does a Sewer Camera Inspection Take
- What Fails a Sewer Inspection and How to Identify Problems
- Sewer Camera Inspection Cost and When to Call a Professional
- Frequently Asked Questions
Last Updated: October 1, 2026
Why Sewer Camera Inspection Matters for Your Plumbing
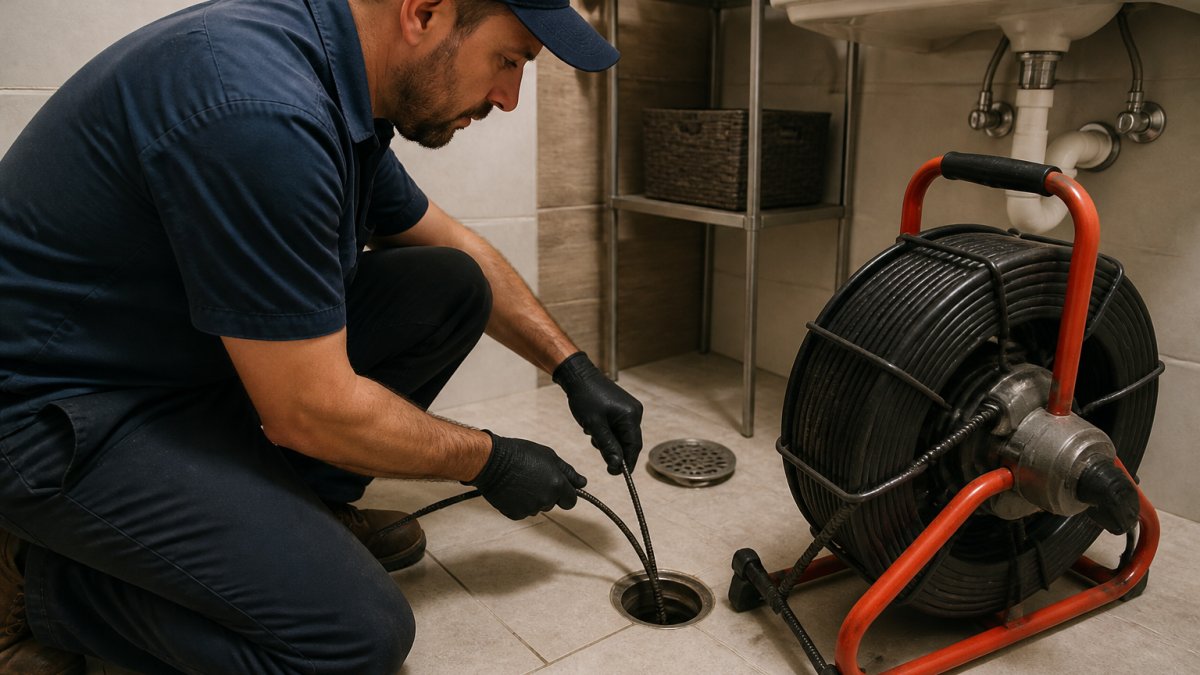
A sewer camera inspection is a diagnostic tool that lets plumbers see inside your pipes without digging. It uses a small waterproof camera attached to a fiber optic cable to capture real-time video of your sewer line‘s condition. At Alpha Rooter & Plumbing, we use this technology to identify blockages, cracks, root intrusion, and structural damage.
Most homeowners don’t think about their sewer line until something goes wrong. By then, you’re looking at water backing up into your home, sewage in your yard, or a massive repair bill. A sewer camera inspection catches problems early, when they’re cheaper to fix.
The inspection process is straightforward but requires preparation on your part. If your plumbing system isn’t ready, the camera can’t reach the problem areas, and you’ll waste time and money. This guide walks you through exactly how to prepare so your inspection goes smoothly and delivers the answers you need.
Step 1: Locate Your Sewer Access Point and Cleanout
Before the camera goes in, you need to find where it enters your sewer line. Most homes have a cleanout, a pipe with a removable cap that provides access to your main sewer line. Finding it takes a few minutes but saves hours during the actual inspection.
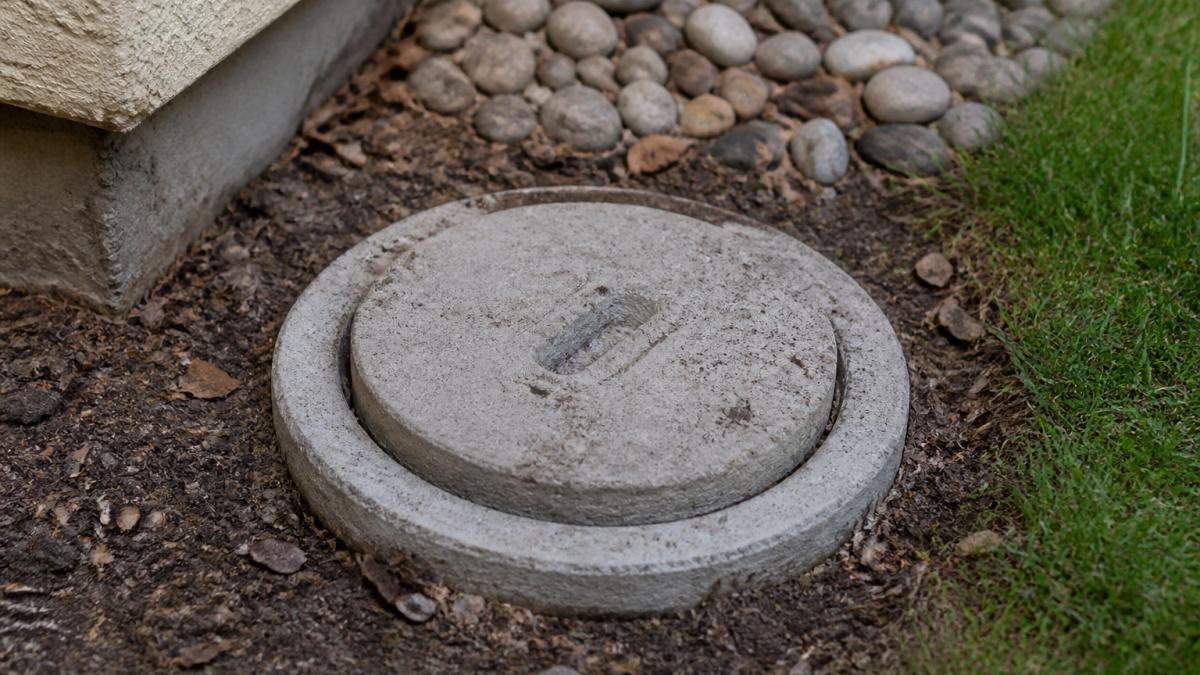
Start by walking your property line. Look for a white or black PVC pipe sticking a few inches above ground, usually in your front or back yard. It might be near your foundation or along the side of your house. Some cleanouts are buried slightly below ground level, so check for a raised concrete or plastic cover marked with a lid.
If you can’t find it outside, check your basement or crawlspace. Older homes sometimes have indoor cleanouts near the main drain or water heater. You can also check your property survey or plumbing records if you have them, they often show the cleanout location.
Once you locate it, mark it clearly so the plumber knows exactly where to work. Clear away any plants, furniture, or debris around it. The camera operator needs safe access to do their job properly.
Step 2: Clear and Prepare Your Plumbing System
Your plumbing system needs to be as clean as possible before the camera enters. Debris, grease buildup, and standing water can block the camera’s view, damage equipment, and prevent accurate diagnosis of underlying problems. The preparation method you choose depends on your system’s condition and history.
Basic Pre-Inspection Flushing
Start by running water through all drains in your home. Let water flow from your kitchen sink, bathroom sinks, showers, and toilets for a few minutes each. This flushes loose debris toward the main line and gives the plumber a clearer picture of what’s happening. Avoid using your plumbing system for at least two hours before the inspection. Don’t run laundry, take showers, or flush toilets unnecessarily. This lets debris settle and gives the plumber better visibility.
When to Use Mechanical Snaking
Snaking (also called augering) uses a rotating cable with a cutting head to break through blockages and pull debris out of the line. This method works well for localized clogs, a single blockage from toilet paper, wipes, or debris stuck near a fixture. Snaking is faster than hydro-jetting, typically costs less, and can be done immediately before inspection. However, snaking doesn’t clean the entire pipe wall; it only clears a path for the camera. If your line has grease buildup, mineral deposits, or multiple partial blockages, snaking alone may leave residue that obscures the camera’s view of pipe damage.
When to Use Hydro-Jetting
Hydro-jetting uses high-pressure water (typically 3,000 to 4,000 PSI) to blast debris, grease, roots, and buildup from the entire interior pipe surface. This method is more thorough than snaking and leaves the pipe cleaner, which means the camera captures a clearer picture of the actual pipe condition. Hydro-jetting is essential if you have a history of grease buildup (common in kitchens or restaurants), recurring slow drains throughout your home, or if previous inspections showed heavy mineral or sediment deposits. The trade-off: hydro-jetting takes longer (1 to 2 hours for a typical residential line) and costs more than snaking. It also requires careful pressure control to avoid damaging older pipes made of clay or cast iron.
Deciding Between Snaking and Hydro-Jetting
If you have a single known blockage and no history of backup issues, snaking before inspection is usually sufficient. If you experience recurring slow drains, have had previous backups, or are inspecting an older home with unknown pipe material, ask your plumber whether pre-inspection hydro-jetting is recommended. Many professionals recommend hydro-jetting for lines older than 30 years or those with visible grease or sediment problems, because it ensures the camera can see the actual pipe walls rather than just a path through debris.
If Your System Has Been Backing Up
Don’t panic, and don’t attempt to clear it yourself with chemical drain cleaners, these can damage pipes and create safety hazards during inspection. Tell the plumber about the backup when you schedule. They’ll assess whether the line needs snaking or hydro-jetting before the camera runs, and they may recommend this as a separate service performed before the inspection begins. This ensures the camera can actually reach the problem area and identify the root cause.
Step 3: Understand Safety Precautions for Inspection
Sewer lines contain hazardous gases and bacteria. Your plumber handles the dangerous work, but you should understand the safety measures they’re taking.
Professional plumbers follow strict safety protocols. They use proper ventilation equipment, wear protective gear, and never enter a sewer line without backup. The camera does the exploring, the plumber stays safely above ground.
Before the inspection starts, ask your plumber about their safety procedures. Do they use gas detection equipment? Are they licensed and insured? At Alpha Rooter & Plumbing, all technicians carry proper licensing (License #874454) to ensure work is done safely and correctly.
Keep children and pets away from the work area during the inspection. The cleanout will be open, and you don’t want anyone near the opening or the equipment.
How Long Does a Sewer Camera Inspection Take
A typical sewer camera inspection takes 30 to 60 minutes from start to finish. This includes locating the cleanout, running the camera, and reviewing the footage with you.
The actual camera time depends on how far your sewer line extends and how many issues the plumber finds. A straightforward inspection of a 50-foot lateral might take 20 minutes. A longer main line or one with multiple problems might take longer.
After the camera run, the plumber will review the video with you and explain what they found. They’ll show you problem areas on the monitor and discuss repair options. This discussion can add 15 to 30 minutes to the total time.
Weather and ground conditions can affect timing too. Rain-soaked soil or frozen ground might require extra time to safely access the cleanout. Let your plumber know about any access challenges when you schedule.
What Fails a Sewer Inspection and How to Identify Problems
A sewer camera inspection reveals the actual condition of your pipes. The plumber looks for specific issues that indicate damage or blockages requiring repair. Understanding what you’re seeing on the footage and how to interpret severity helps you make informed decisions about repairs and prioritization.
Root Intrusion
Tree roots seek moisture and can penetrate small cracks in your pipes, eventually blocking the entire line. On camera footage, you’ll see fine root hairs or thick root masses protruding into the pipe interior, sometimes appearing as a “hairy” or “feathery” obstruction. Root intrusion severity ranges from minor (a few thin roots that don’t significantly restrict flow) to severe (roots filling 50% or more of the pipe diameter, causing backups). Minor root intrusion can often be managed with periodic hydro-jetting every 1 to 2 years. Severe intrusion typically requires trenchless pipe bursting or excavation and replacement. Ask your plumber to note the percentage of pipe blockage caused by roots and whether the roots are actively growing or dead. This determines urgency: actively growing roots warrant faster action than dormant ones.
Pipe Collapse
Pipe collapse occurs when pipes break or cave in completely.
Offset Joints
Cracks and Breaks
Grease Buildup
Debris and Blockages
Documenting Your Findings
Prioritizing Repairs
Sewer Camera Inspection Cost and When to Call a Professional
Sewer camera inspection pricing depends on several factors: how far your line extends, how accessible the cleanout is, and whether additional services like cleaning are needed. Rather than guess at costs, contact Alpha Rooter & Plumbing directly for an upfront quote, we provide upfront pricing with no hidden fees.
Frequently Asked Questions
Do I need to clear my sewer line before a sewer camera inspection?
Yes, clearing debris and standing water before your sewer camera inspection improves image clarity and allows the camera to travel through the full length of your line. Most plumbers recommend flushing the system and removing visible blockages beforehand. If your line is severely clogged, the inspector may need to perform hydro-jetting or debris removal first, which can extend the inspection timeline and add to the overall cost.
What are the common problems found during a sewer camera inspection?
Common issues include root intrusion from tree roots breaking into pipes, pipe collapse from age or ground shifting, offset joints where pipes have separated, and clog detection from grease buildup or debris. Older cast iron or clay pipes often show corrosion and structural damage. The video feed captures these problems in real-time, allowing your plumber to recommend the right repair approach, whether that’s trenchless methods or traditional excavation.
What should I do if the inspector finds a blockage during the inspection?
If a blockage is discovered, your plumber will discuss repair options with you on the spot. Minor clogs may be cleared with a plumbing snake, while more serious blockages often require hydro-jetting to remove buildup from grease, roots, or debris. For structural issues like pipe collapse or severe root intrusion, trenchless inspection technology can help determine whether repair or replacement is necessary. Ask for a written report documenting the findings and recommended next steps.
Can a sewer camera go down the toilet?
Yes, a pipe inspection camera can be inserted through a toilet to inspect the branch line connected to it. However, most plumbers prefer accessing the main sewer line through the cleanout or access point for a more complete inspection. Using the toilet as an entry point works best for diagnosing issues in a specific bathroom’s drain line rather than the entire plumbing system. Your plumber will determine the best access point based on your specific drainage problem.
Comments are closed