
Table of Contents
- Understand the Signs of a Hidden Water Leak
- Locate and Maintain Your Main Water Shutoff Valve
- Install the Best Leak Detection Systems for Homes
- Inspect Your Plumbing System Regularly
- Protect Pipes From Freezing and Corrosion
- Create a Plumbing Maintenance Checklist for Homeowners
- Prepare an Emergency Response Plan
- Frequently Asked Questions
Last Updated: September 2, 2026
Understand the Signs of a Hidden Water Leak
A hidden water leak is water escaping from pipes, fixtures, or supply lines behind walls, under floors, or in concealed spaces. These leaks cause damage silently for weeks or months before becoming obvious, making them far more destructive than visible drips.
Common indicators include soft spots or discoloration on walls and ceilings, musty odors in basements or crawl spaces, unexplained increases in your water bill, and the sound of running water when all fixtures are off. If your water meter keeps moving when you’re not using water, that’s a strong signal something is leaking. Mold growth, warped flooring, or peeling paint can also point to moisture problems from hidden pipes.
By the time these signs appear, water has already infiltrated your home’s structure. Regular monitoring and proactive maintenance prevent costly structural damage or mold remediation. At Alpha Rooter & Plumbing, we help homeowners catch these issues before they escalate.
Check your home’s foundation, basement walls, and crawl spaces regularly for visible moisture, efflorescence (white mineral deposits), or soft drywall. If you notice warning signs, have a licensed plumber inspect your system immediately.
Place a white paper towel under pipes in your basement or under sinks once a month. Any moisture on the towel indicates a slow leak you might otherwise miss.
Locate and Maintain Your Main Water Shutoff Valve
Your main water shutoff valve is the single most important control point for preventing water damage from pipes. It stops water from entering your entire home’s plumbing system and can mean the difference between a minor leak and catastrophic damage.
The main water shutoff valve is typically located where the water supply line enters your home. In warmer climates, it’s often outside near the foundation or in a meter box. In colder regions, it’s usually inside near the basement, crawl space, or utility room. Some homes have shutoff valves in both locations.
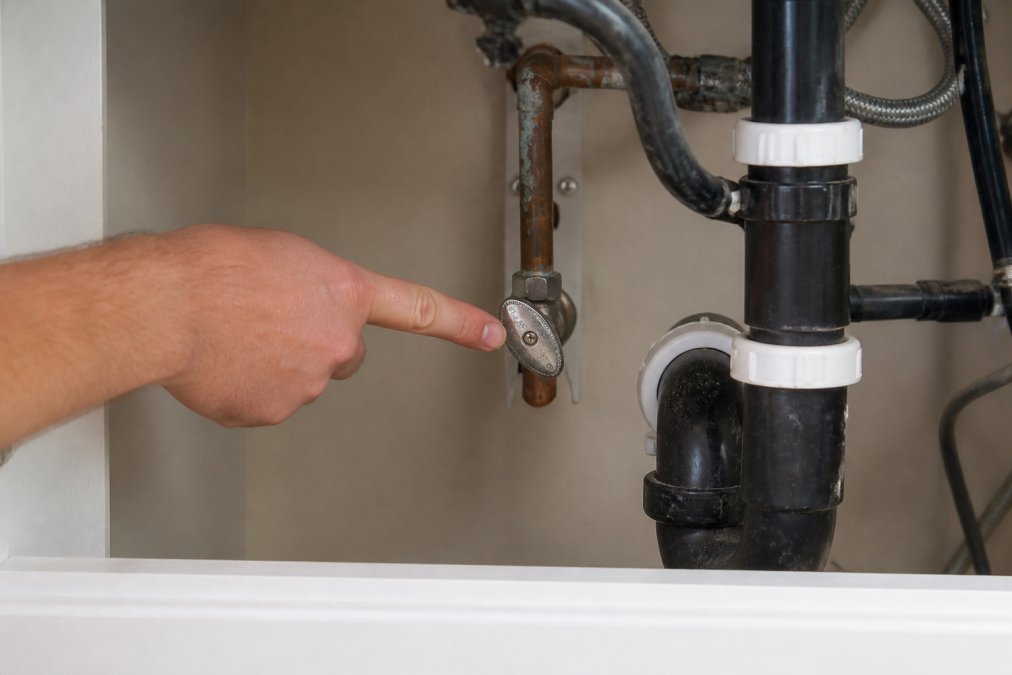
Once you’ve found it, test the valve by turning it clockwise slowly and steadily. After shutting it off, open a nearby faucet to confirm the water has stopped, then turn the valve back on. If the valve is stuck or won’t turn smoothly, don’t force it. A licensed plumber can replace a stuck shutoff valve or install an accessible secondary valve.
Maintain easy access by clearing away storage items around it. Label it with bright tape or a sign so anyone in your home can find it during an emergency. Some homeowners install a secondary shutoff valve in an easier-to-reach location as backup.
Every household member should know where the main water shutoff valve is located and how to operate it. Test it twice a year to ensure it works when you need it most.
Install the Best Leak Detection Systems for Homes
Modern leak detection systems range from simple water sensors to smart home integration that alerts you to problems in real time. These devices sit under sinks, near water heaters, in basements, and along supply lines.
Basic water sensors are affordable and effective. They’re small devices that emit an alarm when they detect moisture. You place them in high-risk areas: under bathroom sinks, near the water heater, in basements, and around washing machines. The downside is you need to be home to hear the alarm, and they don’t automatically shut off water.
Smart leak detection systems connect to your home WiFi and send alerts to your phone when moisture is detected. Some systems include automatic shutoff capabilities that close a valve and stop water flow if a major leak is detected, preventing water from spreading while you contact a plumber.
The best system for your home depends on your budget, your home’s age, and how much automation you want. Older homes with galvanized pipes or cast iron drainage systems benefit most from comprehensive monitoring because these materials are prone to corrosion and failure.
Install sensors in these critical locations:
- Under all sinks and near faucet supply lines
- Around the water heater and its connections
- Behind and under washing machines
- In basements and crawl spaces near the foundation
- Near toilets (especially if they’re slow to fill or run constantly)
- Under dishwashers and refrigerator water lines
Smart leak detection systems require power and WiFi connectivity. If your WiFi goes down or the battery dies, you lose monitoring capability. Keep batteries fresh and test your system monthly.
Inspect Your Plumbing System Regularly
A plumbing inspection is a systematic examination of your pipes, fixtures, connections, and drainage systems to identify corrosion, leaks, weak points, and maintenance needs. Regular inspections catch problems while they’re small and manageable.
Schedule a professional plumbing inspection every 2-3 years, or annually if your home is older than 40 years (asce.org). During an inspection, a licensed plumber uses video camera technology to look inside pipes and identify cracks, mineral buildup, root intrusion, and corrosion. They’ll check water pressure, test shutoff valves, inspect visible pipes for leaks, and examine connections at fixtures.
You can also perform visual inspections yourself between professional visits. Look for discolored water from faucets (brown or reddish tint suggests rust or corrosion), low water pressure at multiple fixtures, rust stains around pipe joints, visible corrosion on exposed pipes, cracks or splits in visible pipes, and water pooling near the foundation or in the basement.
Pay special attention to basements, crawl spaces, and utility rooms where pipes are exposed. For homes with older materials like galvanized steel pipes or cast iron drainage lines, inspections become critical. These materials have a lifespan of 50-75 years. If your home is approaching or exceeding that age, preventative replacement of failing sections is far cheaper than dealing with burst pipes and water damage.
Take photos of your visible pipes and their condition. Keep a log of any leaks or issues you notice. This history helps a plumber understand patterns and predict future problems.
Protect Pipes From Freezing and Corrosion
Frozen pipes and corroded pipes are two of the most common causes of catastrophic water damage in homes. Both are preventable with the right maintenance and protection strategies.
Frozen pipes occur when water inside a pipe freezes and expands, putting pressure on the pipe walls until they crack or burst. This typically happens in uninsulated areas like attics, crawl spaces, exterior walls, and garages during winter. Corrosion happens when water chemistry or pipe materials interact over time, creating weak spots that eventually leak or fail.
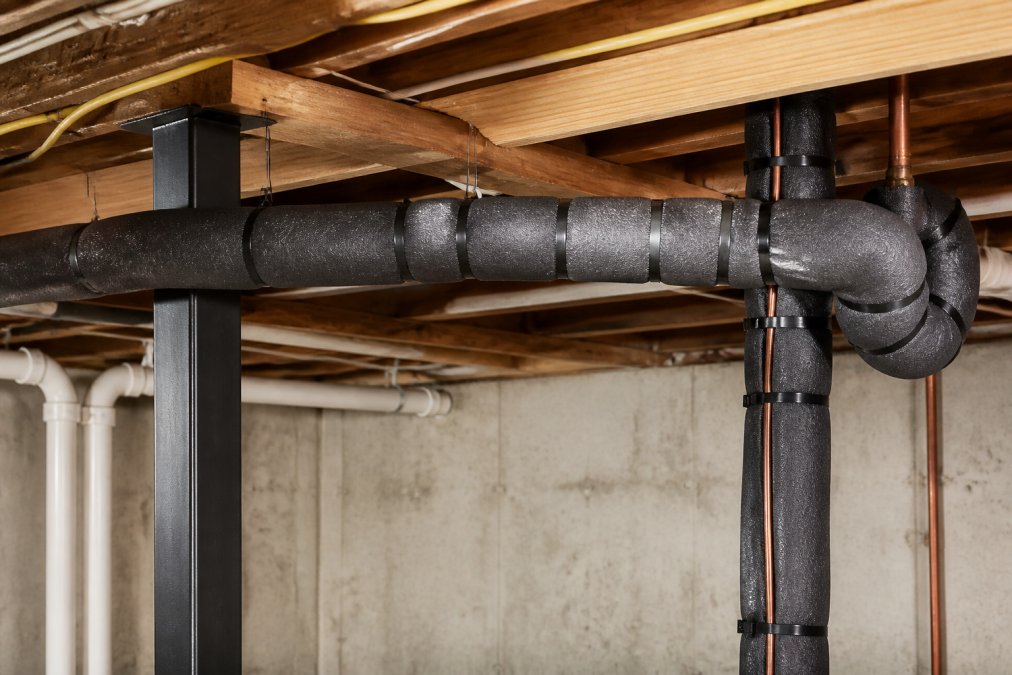
Insulation is your first line of defense against freezing. Wrap exposed pipes with foam pipe insulation sleeves, especially in unheated areas near exterior walls, in attics, and in basements. For pipes in extremely cold areas or those that have frozen before, add heat tape, an electric heating cable that wraps around the pipe and keeps it above freezing.
Maintain proper water pressure by installing a water pressure regulator if your system runs above 80 PSI (the CDC). High pressure puts constant strain on pipes and fittings, accelerating corrosion and failure. A pressure regulator reduces incoming pressure to a safe 50-75 PSI range, extending pipe life and reducing leak risk.
Drain outdoor faucets and irrigation lines before winter arrives. Close interior shutoff valves for outdoor water supplies, then open the outdoor faucets to let remaining water drain out. Install frost-proof faucets in areas prone to freezing, as these have internal shutoff mechanisms that prevent water from sitting in the exposed part of the faucet.
Address water chemistry issues that accelerate corrosion. If your water is acidic or has high mineral content, consider installing a water softener or pH adjustment system to reduce corrosion rates on copper, galvanized steel, and other materials.
Create a Plumbing Maintenance Checklist for Homeowners
A structured maintenance checklist ensures you stay on top of preventing water damage from pipes throughout the year.
Monthly tasks:
- Inspect under sinks for moisture or water stains
- Check water meter reading and compare to last month’s bill
- Test main water shutoff valve to ensure it operates smoothly
- Look for any visible leaks at faucets, supply lines, or fixtures
Quarterly tasks:
- Inspect basement or crawl space pipes for corrosion, mineral deposits, or moisture
- Check water heater for leaks and sediment buildup
- Examine exposed pipes for cracks, discoloration, or weak points
- Test smart leak detection sensors if installed
Annual tasks:
- Drain and winterize outdoor faucets (fall)
- Inspect and clean gutters and downspouts (spring and fall)
- Check water pressure with a pressure gauge (should read 50-80 PSI) (the EPA)
- Examine the main water shutoff valve and any secondary valves for corrosion
- Review water bills for unusual spikes that might indicate hidden leaks
Every 2-3 years:
- Schedule a professional plumbing inspection
- Have a plumber check water heater condition and flush sediment if needed
- Inspect sump pump operation if your home has one
- Review pipe insulation and heat tape condition in unheated areas
Every 5-10 years:
- Consider replacing water heater if it’s nearing the end of its lifespan
- Evaluate whether galvanized pipes need replacement (especially if home is 40+ years old)
- Have a video camera inspection of drainage lines if you’ve had recurring backups
| Task | Frequency | Priority | Notes |
|---|---|---|---|
| Check for visible leaks | Monthly | High | Look under sinks and near fixtures |
| Test shutoff valve | Monthly | High | Ensure it operates smoothly |
| Monitor water meter | Monthly | Medium | Track usage patterns |
| Inspect exposed pipes | Quarterly | High | Look for corrosion or damage |
| Professional inspection | Every 2-3 years | High | Catch hidden problems early |
| Winterize outdoor lines | Annually (fall) | High | Prevent freeze damage |
| Flush water heater | Annually | Medium | Reduce sediment buildup |
Keep this checklist posted near your water heater or main shutoff valve. Set phone reminders for seasonal tasks like winterization. The small effort invested in regular maintenance prevents thousands in damage.
Most homeowners skip maintenance until something breaks. A simple checklist takes 30 minutes per month and prevents thousands in damage.
Prepare an Emergency Response Plan
Even with the best prevention practices, emergencies happen. A water damage emergency requires fast action to minimize loss. Having a plan in place means you’ll respond correctly under stress.
Start by documenting your home’s plumbing layout. Take photos or video of your main shutoff valve location, water heater, visible pipes, and the locations of secondary shutoff valves. Store this documentation in your phone’s cloud storage and in a physical folder.
Assemble an emergency kit and keep it accessible. Include a wrench or valve key sized for your main shutoff valve, towels and buckets for catching water, flashlight and extra batteries, your plumber’s contact information, and your homeowner’s insurance policy and adjuster contact.
Program your plumber’s number into your phone. Alpha Rooter & Plumbing provides 24/7 emergency response with a guarantee of under 90-minute arrival times. Having a trusted plumber’s number saved means you can call immediately when a pipe bursts or major leak starts.
When a water emergency occurs:
- Shut off the main water supply immediately at the shutoff valve
- Call your plumber right away, don’t wait to assess the damage yourself
- Turn off electricity to affected areas if water is near outlets or appliances
- Begin removing water with towels and buckets if it’s safe to do so
- Open windows and doors to increase air circulation
- Take photos of all damage for insurance documentation
- Contact your homeowner’s insurance adjuster to report the claim
Document everything with photos and video before cleanup begins. Insurance companies need visual evidence of the damage to process claims.
Preventing water damage from pipes requires awareness, regular maintenance, and preparedness. By understanding the signs of hidden leaks, knowing how to shut off your water, installing detection systems, and maintaining your plumbing regularly, you dramatically reduce the risk of catastrophic damage to your home.
The cost of prevention is a fraction of what you’ll pay for water damage restoration, structural repairs, and mold remediation. Most homeowners can implement these strategies without significant expense.
When you need professional help with plumbing inspections, shutoff valve maintenance, or emergency response, Alpha Rooter & Plumbing is ready to assist. With 24/7 availability, licensed technicians, state-of-the-art diagnostic equipment, and upfront pricing with no hidden fees, we make preventing water damage from pipes straightforward and affordable. Call now for a consultation on your home’s plumbing condition.
Frequently Asked Questions
What should I do immediately if a pipe bursts?
Turn off your main water shutoff valve right away to stop water flow. If you don’t know where it is, check under the sink, in the basement, or near the water heater. Once the water is off, open faucets to drain remaining water from the lines. Call a licensed plumber immediately for repairs. Document the damage with photos for insurance purposes. Do not delay, burst pipes can cause severe structural damage within hours.
What are the most common signs of a hidden water leak?
Watch for unexplained increases in your water bill, soft spots in walls or ceilings, discoloration or staining on drywall, musty odors in enclosed spaces, and visible mold growth. You may also notice water pooling in your yard or basement without obvious cause. Check your water meter; if it shows usage when no water is running, a hidden leak likely exists. Early detection prevents costly water damage mitigation and structural problems.
How often should I have my pipes inspected for leaks?
Schedule a professional plumbing inspection at least once every two years for newer homes, and annually for homes over 30 years old with older pipe materials. If you notice signs of a hidden water leak or live in an area with hard water or corrosive soil, inspect more frequently. Many homeowners also schedule inspections before winter to prepare for freezing temperatures. Regular inspections catch problems early and protect your home’s structural integrity.
Does homeowners insurance cover water damage from pipes?
Coverage depends on your policy and the cause of the damage. Sudden, accidental pipe bursts are typically covered, but gradual leaks from poor maintenance are usually not. Flood damage is excluded from standard homeowners insurance. To protect yourself, maintain detailed records of all plumbing inspections and repairs, photograph any damage immediately, and document the date and cause. Contact your insurance agent about specific coverage limits and requirements for your policy.
This article was written using GrandRanker
Comments are closed